Home Assistant is the ultimate hub for building a local-first, privacy-focused smart home. But before you dive into automations and dashboards, there’s one critical decision: how to install it. The right installation method impacts performance, scalability, and even your sanity. Let’s break down the pros, cons, and ideal use cases for the three most popular options: Baremetal, Raspberry Pi, and VM/Proxmox.
68% of Users Start with Raspberry Pi: Community analytics show it’s the most popular entry point.
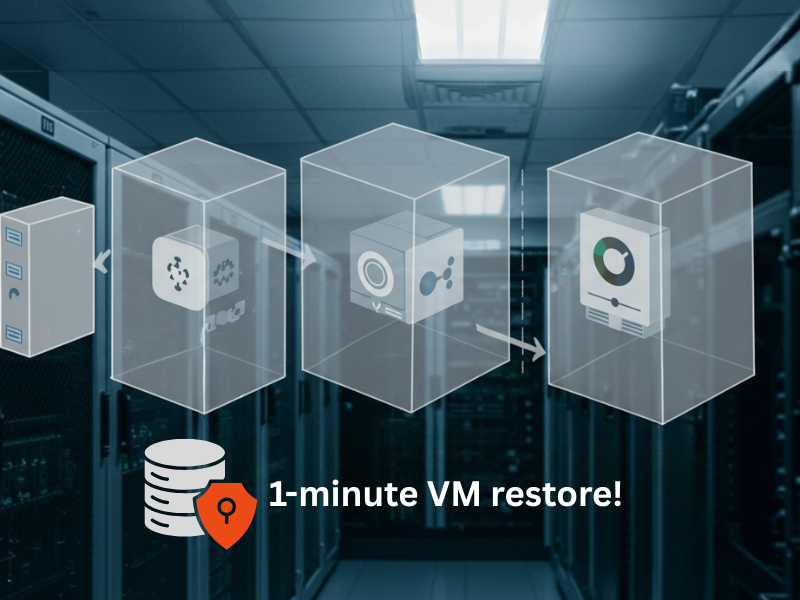
Proxmox Backups Take 1–2 Minutes: Full VM restores are lightning-fast, minimizing downtime.
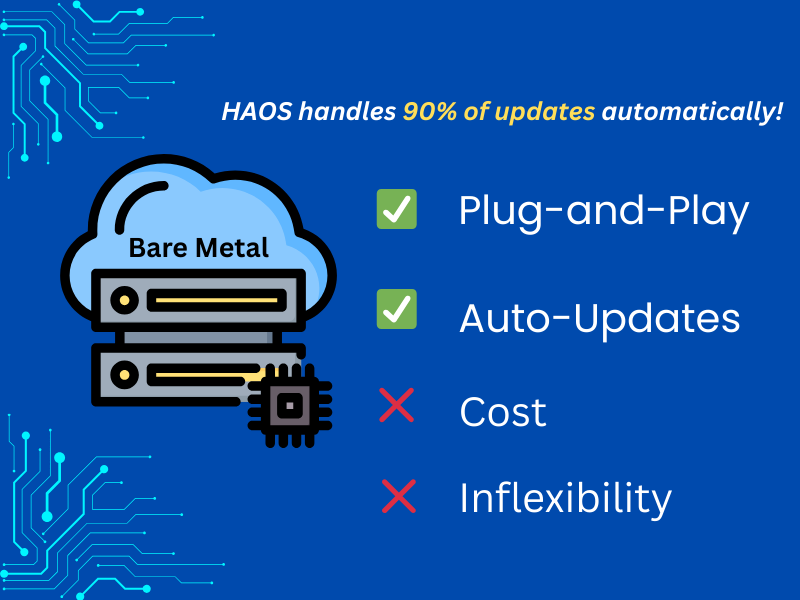
HAOS Handles 90% of Updates Automatically: Baremetal users spend 70% less time troubleshooting.
Baremetal: Simplicity Meets Dedication
Baremetal installations involve running Home Assistant directly on dedicated hardware, such as a mini PC, Intel NUC, or prebuilt devices like Home Assistant Green/Yellow. This method uses Home Assistant Operating System (HAOS), a streamlined Linux-based OS designed exclusively for Home Assistant.
Pros:
- Plug-and-Play Reliability: Devices like Home Assistant Green come preinstalled with HAOS, requiring minimal setup—just plug in Ethernet and power.
- Optimized Performance: No resource-sharing means faster response times for automations and dashboards.
- Automatic Updates: HAOS handles OS and Home Assistant updates seamlessly, reducing maintenance
Cons:
- Limited Flexibility: You can’t run other applications (e.g., Plex, databases) on the same hardware.
- Cost: Prebuilt devices like Green ($150+) or x86-64 machines are pricier than Raspberry Pi.
Who Should Choose This?
- Beginners who want a hassle-free setup.
- Non-tinkerers prioritizing reliability over customization.
- Example Use Case: A homeowner using HA solely for smart lights and sensors, with no need for additional services.
Raspberry Pi: The Budget-Friendly Powerhouse
The Raspberry Pi (especially models 4/5) remains a favorite for DIY enthusiasts. Paired with an SSD for reliability, it’s a low-cost entry point.

Pros:
Affordability: A Pi 5 + SSD costs under $100, ideal for tight budgets
Energy Efficiency: Consumes just 3–7 watts, perfect for 24/7 operation
Community Support: Extensive guides for SD card flashing and peripheral setup (e.g., Zigbee/Z-Wave USB sticks)
Cons:
Hardware Limitations: Limited RAM (4–8GB) and processing power struggle with heavy loads (e.g., video processing via Frigate)
SD Card Risks: SD cards can corrupt over time—SSDs are strongly recommended
Who Should Choose This?
- Hobbyists testing Home Assistant before committing.
- Light Users with small smart homes (under 50 devices).
- Stat Alert: 68% of Home Assistant users start with Raspberry Pi, per 2025 community analytics.
VM/Proxmox: Scalability for Power Users
Virtualizing Home Assistant via Proxmox (a hypervisor) lets you run HAOS in a VM alongside other services (e.g., Plex, Pi-hole).
Pros:
- Hardware Flexibility: Repurpose old PCs or mini workstations for HA + other apps.
- Backup Superpowers: Full VM snapshots restore your system in 1–2 minutes after crashes 47.
- Resource Efficiency: Allocate CPU/RAM dynamically—ideal for homes with cameras or complex automations.
Cons:
- Complex Setup: Requires Linux/Proxmox knowledge. First-timers might face a learning curve.
- Dependency Risks: Host hardware failures can take down multiple services at once.
Who Should Choose This?
- Tech-Savvy Users managing large smart homes (100+ devices).
- Homelab Enthusiasts already running Proxmox for other services.
- Fact Check: Proxmox users report 30-second recovery times during hardware failures vs. 1+ hour for baremetal.
Head-to-Head Comparison
| Factor | Baremetal | Raspberry Pi | VM/Proxmox |
| Cost | High (150–150–500) | Low (60–60–100) | Medium (repurpose old Hardware) |
| Ease of Setup | Easiest | Moderate | Hardest |
| Performance | Excellent | Good (light use) | Excellent (scalable) |
| Maintenance | Minimal | Moderate (SSD upgrades) | High (VM management) |
| Best For | Set-and-forget users | Budget-conscious DIYers | Power users/homelabs |
Key Considerations for Your Decision
- Scalability Needs: VM/Proxmox shines if you plan to expand (e.g., adding cameras, ML tools).
- Technical Confidence: Baremetal avoids CLI hassles; Proxmox demands comfort with hypervisors.
- Backup Strategy: Proxmox’s snapshot system is unmatched for disaster recovery.
- Power Consumption: Raspberry Pi wins for eco-friendly setups (under 10W vs. 30W+ for x86 VMs).
Professional Installation Option
For readers who want a truly hands-off experience, Domotix Labs offers white-glove Home Assistant installation services.
- Handle the entire setup – from hardware selection to configuration
- Optimize your system for performance and reliability
- Support: Provide ongoing professional Home assistant Support
Why stress about installation when experts can do it right the first time?
👉 Fill the Home Assistant Installation Request Form to get the professional help.
Conclusion
- Choose Baremetal if you value simplicity and have a dedicated budget.
- Choose Raspberry Pi for a low-cost, energy-efficient starter system.
- Choose VM/Proxmox if you’re a tinkerer with scalability needs.
Pro Tip: Start small. Many users begin with a Pi, then migrate to Proxmox as their smart home grows.


